Today I am going to show you how to use dispatcher object in WPF application. But before starting lets have some insights on dispatcher objects. DispatcherObject is meant for any object that wants to be accessed only in the thread that created it. Many WPF classes are derived from DispatcherObject class.
When a WPF application starts, two threads are spawned by the WPF application. One background thread for managing the UI and another for rendering the various controls on UI. As a developer many of the times we do not deal directly with the rendering thread. We just put required controls in the UI and implement their code behind.
UI thread picks each control to be rendered and places it in the Dispatcher. Dispatcher queue processes each control on priority basis.
I think that is enough to have the basic idea WPF threads. Now lets move back to usage of DispatcherObject.
Since Dispatcher also processes each control one by one, our application can’t leverage the power of multi threading to make the application responsive.
While developing WPF application, we often encounter a situation where in a button click or some other events take longer time to process. This can be due to fetching heavy data or might be some other time consuming task.
If we write code for this long running task in an event, WPF application has to wait till that task gets finished and ultimately freezes our app.
At this time a DispatcherObject can come to our rescue and can make our application responsive.
To demonstrate this concept I have created a WPF application in visual studio 2015.
I have added two buttons and two text boxes in this WPF application. XAML code for the same looks as below
<Window x:Class="DiapatcherDemo.MainWindow"
        xmlns="http://schemas.microsoft.com/winfx/2006/xaml/presentation"
        xmlns:x="http://schemas.microsoft.com/winfx/2006/xaml"
        xmlns:d="http://schemas.microsoft.com/expression/blend/2008"
        xmlns:mc="http://schemas.openxmlformats.org/markup-compatibility/2006"
        xmlns:local="clr-namespace:DiapatcherDemo"
        mc:Ignorable="d"
        Title="MainWindow" Height="350" Width="525">
    <Grid>
        <StackPanel>
            <Button Name="btnLong" Click="btnLong_Click" Background="DarkSeaGreen" Width="200" HorizontalAlignment="Center">Start a long running task</Button>
            <TextBox Name="txtInfo" Background="Salmon">Task not started yet</TextBox>
            <Button Name="btnCurrent" Click="btnCurrent_Click" Background="CadetBlue" Width="200" HorizontalAlignment="Center">Do other tasks</Button>
            <TextBox Name="txtCurrent" Background="Moccasin">Result of other tasks</TextBox>
        </StackPanel>
    </Grid>
</Window>
We will use first button to start a long running task. Meanwhile we can use functionality of second button while long running task initiated by first button is still running.
Code behind for this application is
private delegate void CalculateTimeElapsed();
DateTime currentDateTime;
static int count = 0;

private void btnLong_Click(object sender, RoutedEventArgs e)
{
    btnLong.IsEnabled = false;
    currentDateTime = DateTime.Now;

    Thread longRunningThread = new Thread(new ThreadStart(delegate ()  { Thread.Sleep(10000); Application.Current.Dispatcher.BeginInvoke(System.Windows.Threading.DispatcherPriority.Normal, new CalculateTimeElapsed(PostLongRunningTasks)); }));
    longRunningThread.Start();
}
In above event, a thread has been initiated. In this thread a long running task is performed which is Thread.Sleep(10000) in our case. After this we have instructed thread delegate to invoke a method
PostLongRunningTasks on applications Dispatcher object, because a button has been created from Application’s thread. In this method we can alter/change/assign any existing WPF controls present in current application.
Lets have a look into this method’s implementation
private void PostLongRunningTasks()
{
    txtInfo.Text = "Total time elapsed required to finish the task is : " + (DateTime.Now - currentDateTime);
    btnLong.IsEnabled = true;
}
Since above method is attached to BeginInvoke, it runs asynchronously on the application thread(as we have attached it to application’s Dispatcher object).
Below is the implementation of the second button, which remains responsive while long running task initiated by first button is going on.
private void btnCurrent_Click(object sender, RoutedEventArgs e)
{
    txtCurrent.Text = "Above button is clicked " + ++count + " times";
}
This is how we can implement multi threading in WPF. There are many other ways to implement multi threading and this is one of them.
Here are the screen shots of the application.
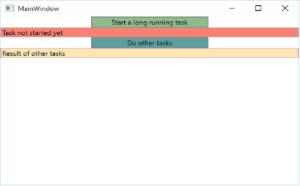
before running a task
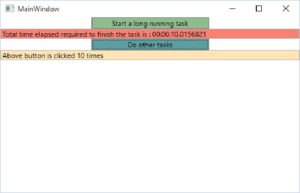
after running task
Complete code sample can be downloaded from Git
Please don’t do it like this. Working with threads is error prone and hard maintainable. Use newer language features like async/await to start up a long running process.
Pseudo code:
Async void Btn_click(…)
{
//ui thread, and in the lambda you are on a threadpool thread.
await Task.Run(() => Thread.Sleep(10000));
// Here you are back on the ui thread
}
And if you just want to sleep use Task.Delay(10000)
Hi Philipp,
Thank you for your suggestion.